Saturday, July 10, 2010

Pretty Girl Makes Cupcakes

Hi everyone. Good news, I’m neither dead, nor retired from blogging. It’s just been a busy few months, and I haven’t had the time / energy to do much baking, and even less to do posting. Since my last post I’ve graduated from law school (hooray), started studying for the bar exam (boooo), and have started packing for a move to DC at the end of the summer. All in all, a busy time. Because of the bar don't expect many, or even any, new posts for awhile, but I thought I'd try for at least this one update.

This weekend though, I was fortunate enough to have a pretty girl help me make cupcakes (hence the title of the post). Hattie (the aforementioned pretty girl) and I made Chocolate-Banana-Peanut butter cupcakes for a Fourth of July party. These aren’t exactly new for me, as I’ve done a pretty fair number of chocolate peanut butter desserts, but I thought the addition of banana made these excellent. The cake is my basic chocolate, filled with a chocolate banana ganache, and frosted with a peanut butter frosting. The combination was excellent, if I can say so, and the banana really came through as a flavor in the ganache, even though you wouldn't suspect it (it just has the texture and appearance of regular whipped ganache).

Chocolate Cupcakes

Makes ~26

2 sticks unsalted butter
½ cup cocoa-powder
¾ cup water
2 cups sugar
2 eggs
½ cup well-shaken buttermilk
1 T vanilla
2 cups flour
1 tsp baking soda
1 t cinnamon
¼ tsp salt

1. Preheat oven to 350. Sift together the flour, baking soda, cinnamon and salt.

2. Melt the butter in a heavy bottomed sauce pan over low heat. Add in the cocoa powder and whisk until smooth. Then add the water and mix until smooth again. Remove from heat

3. One at a time mix in the sugar, egg, buttermilk, and vanilla

4. Sift the dry ingredients over the wet, and whisk until well combined.

5. Fill cupcakes using a ¼ cup measure. Bake for about 18-20 minutes, or until a tester comes out clean. Let them cool thoroughly before frosting.

Chocolate-banana ganache

8 oz. dark chocolate
½ cup heavy cream
½ cup banana puree

1. Chop the chocolate, and place it in a heat proof bowl.

2. Bring the cream to a simmer, pour over the chocolate, allow to sit for a minute, then stir until fully combined.

3. Stir in the banana puree. Allow to cool until set.

4. Pour cooled ganache into the bowl of a mixer, beat with whisk attachment until light in color and fluffy

Peanut Butter frosting

1 cup peanut butter
4 oz cream cheese, softened
1 ½ cups whipped cream (from about 1 cup cream)
1 cup powdered sugar
½ cup banana puree

1. Beat together the peanut butter, cream cheese, and powdered sugar until smooth.

2. Add the whipped cream and beat to combine. Beat in the banana puree.

Assembly

Use the cone method to fill the cupcakes with the whipped ganache. Top with the peanut butter frosting.


Sunday, April 25, 2010

Three Berry Buckle

I’m not going to lie, I considered a lot of puns to title this post, things like “buckle up,” or “get ready to loosen your...” but I ultimately decided against it. Not that I don’t love a good (or bad) pun, as the case may be, but memorializing it seemed like perhaps a bad idea, and so here we are.

If you’ve never had a buckle before, stop what you’re doing (ok, stop once you’re done reading this post and the recipe), and go make a buckle. A buckle is sort of a cross between a cobbler, a cake, a pie, and maybe a crisp. It takes all of the best elements of each, resulting in a soft, super moist cake. I would say it’s almost pudding like, but that really doesn’t do it justice. The buckle is topped with sort of a crispy sugar crust, making it even better.

The recipe I use is adapted from an old Gourmet. My mom has actually been making it for about as long as I can remember. Her advice when I went to make it was this “Bad fruit = bad buckle,” which is absolutely true. The original recipe calls for nectarines and blueberries, but almost anything will work. Ideally you want something with a sort of concentrated flavor. Most stone fruits (nectarines, peaches, etc) are great, as are all kinds of berries. I’ve never tried it with apples or pears, but I bet they would work in a pinch. One of the reviewers on epicurious mentioned having made one with strawberries and rhubarb. Given the early spring season, I went the berry route, and made one with strawberries, raspberries, and blueberries, which are always a solid choice if you can find good ones.

What I can say for sure is that the people I made this for couldn’t stop telling me how good it was. Maybe they were just being polite, but I suspect otherwise...

Fruit Buckle

Makes 9 x 13 pan worth

For filling:

1 cup + 2 T (2 ¼ sticks) unsalted butter, softened
1 cup + 2 T sugar
1 ½ tsp vanilla
3/8 tsp baking powder
2 cups AP flour
¾ tsp salt
4 large eggs
4-5 cups mixed fruit

For topping:

¾ stick COLD unsalted butter, cut into chunks
¾ cups sugar
½ cup AP flour
¾ tsp cinnamon
¾ tsp nutmeg

1. Preheat oven to 350. Butter a 9x13 cake pan or pyrex baking dish.

2. Start by making the topping. In the bowl of a food processor, briefly pulse together the flour, sugar, cinnamon, and nutmeg. Add the cold butter, and pulse until mixture resembles a coarse grain. Put the topping in the fridge while you make the rest of the buckle.

3. In a large bowl (or the bowl of a standing mixer) cream together the butter and the sugar until fluffy. Beat in vanilla.

4. In a small bowl, whisk together the flour, baking powder, and salt.

5. With the mixer on medium speed, alternate adding the flour, and the eggs, one at a time, beating well after each addition.

6. Fold in the fruit. Pour the batter into the prepared pan. Sprinkle the topping liberally over the top of the cake. It might look like you’re putting it on thickly, but remember it melts in the oven, the more you add, the ticker and crunchier a crust you get.

7. Bake for 45-50 minutes, or until the cake is golden on top, and the fruit juice is bubbling up the sides. Check it as you’re going, and if it looks like the top is burning, tent it with tinfoil.

8. Serve warm, with vanilla ice cream or whipped cream.

Thursday, April 15, 2010

Cookie Dough Cake and Turning Two

It’s the second anniversary of my creating this blog and it’s been an interesting experience running the site for the past two years. Originally my intention was at most to document for my own purposes and reference the things I had made. But having the blog changed the way I cook and bake. The need for posts, especially early on, drove me to more cooking and baking that I might otherwise do. It also drove me to push my own limits, if only to keep what I had to write about interesting. It’s also encouraged me to experiment. I can’t post about recipes I’ve made before, and so I have to keep pushing for new things. While this means that I don’t return too much (there are a few, like the tiramisu cupcakes, or the double pumpkin cupcakes, that I will come back to over and over), it also means I keep looking for new things to try. It also just seems boring to make other people’s recipes, I can review them I suppose, and sometimes I do, but at the same time I feel like that’s not adding anything. I’d rather try to make a snickers bar cupcake, or one with candied prosciutto in it, than just making the same old thing. And while I am far from the most creative person out there, I like to at least think I’ve done a few things that if nothing else, no one else has bothered doing, at least in the same way I have.

Interestingly, running the blog has also been an interesting way for me to catalogue my own life. A friend of mine recently went through the blog and made a slideshow of all of the best pictures on the website (I know they’re not all winners). I remembered each baked good, both what I was seeing, as well as what I had made them for, the various parties, potlucks, events, and tribulations of law school over the past two years since starting Amicus Cupcake. And while I don’t tend to add the kinds of persona vignettes that many other bloggers do, for me at least the pictures and the recipes act as triggers of memory far more extensive than what is written.

I know that of course my blogging has slowed down lately. When I was celebrating my 1 year blogoversary, I was also celebrating my 100th post. Now I’m only remarking my 136th, certainly a nearly 2/3 reduction in postings is noteworthy, but it’s just been necessitated by my life. When I do repeat recipes, I don’t have anything to write. Sometimes I don’t have time to take pictures between baking and serving, which means no blog posting. Law school also just takes a lot of time and energy, and I often just don’t feel like writing up my recipes. Last, and probably most important, has been a change in the way I bake. In an effort to eat healthier I’ve instituted personal rules on when I bake, most notably I only bake when I have a good reason, and a way to get rid of it (without eating it all myself). The consequence is less baking, but a healthier me. I think it’s been a fair tradeoff.

Now on to the cake! Earlier this month Annie of Annie’s Eats posted a recipe for cookie dough cupcakes. I’m always a sucker for cookie dough, and so I decided to turn it into a layer cake. The recipe, however, looked a little off to me, and so I went to Bakewise and made a few changes. Namely I reduced the amount of butter (3 sticks seem like a lot for 2 cake layers), reducing the milk, and increasing the sugar. As a result, I can’t actually comment on Annie’s version of the recipe.

That disclaimer aside, I thought this cake was really good, but very dense and rich. The layers of cake were thick, and had a texture that reminded me of pound cake. The edges of the cake were a little overcooked, making the cake harder to cut through, but it didn’t mess up the taste. I would say overall the layers reminded me of cookies. The cookie dough filling itself was great. At first I thought that it tasted too much like sweetened condensed milk, but after a night in the fridge the tastes mellowed and it made an excellent cookie dough substitute. As for the frosting, I omitted the flour to make it lighter, and also took out some of the sugar, because I tend to think buttercreams just have too much sugar in them. I thought the light frosting went well with the heavier cake and filling though.

Cookie Dough Cake

Makes 2 eight inch cake layers

1 ¼ cups (2.5 sticks) unsalted butter, at room temperature
1 2/3 cups light brown sugar, packed
4 large eggs
2 2/3 cups all-purpose flour
1 tsp. baking powder
1 tsp. baking soda
¼ tsp. salt
3/4 cup milk
2 tsp. vanilla extract
1 cup chocolate chips

1. Preheat oven to 350. Butter two 8 inch cake pans, line with parchment, and butter the parchment. Whisk the flour, salt, baking powder and baking soda together and set aside.

2. Cream together the butter and brown sugar in the bowl of a standing mixer on medium speed, until light and fluffy, about 5 minutes.

3. Add the eggs one at a time, beating well after each addition. Scrape down the sides as necessary. In a measuring cup combine the milk and the vanilla.

4. Reduce the mixer speed to slow. Add 1/3 of the flour mixture to the butter, followed by half of the milk. Continue alternating between the two, ending with the dry ingredients

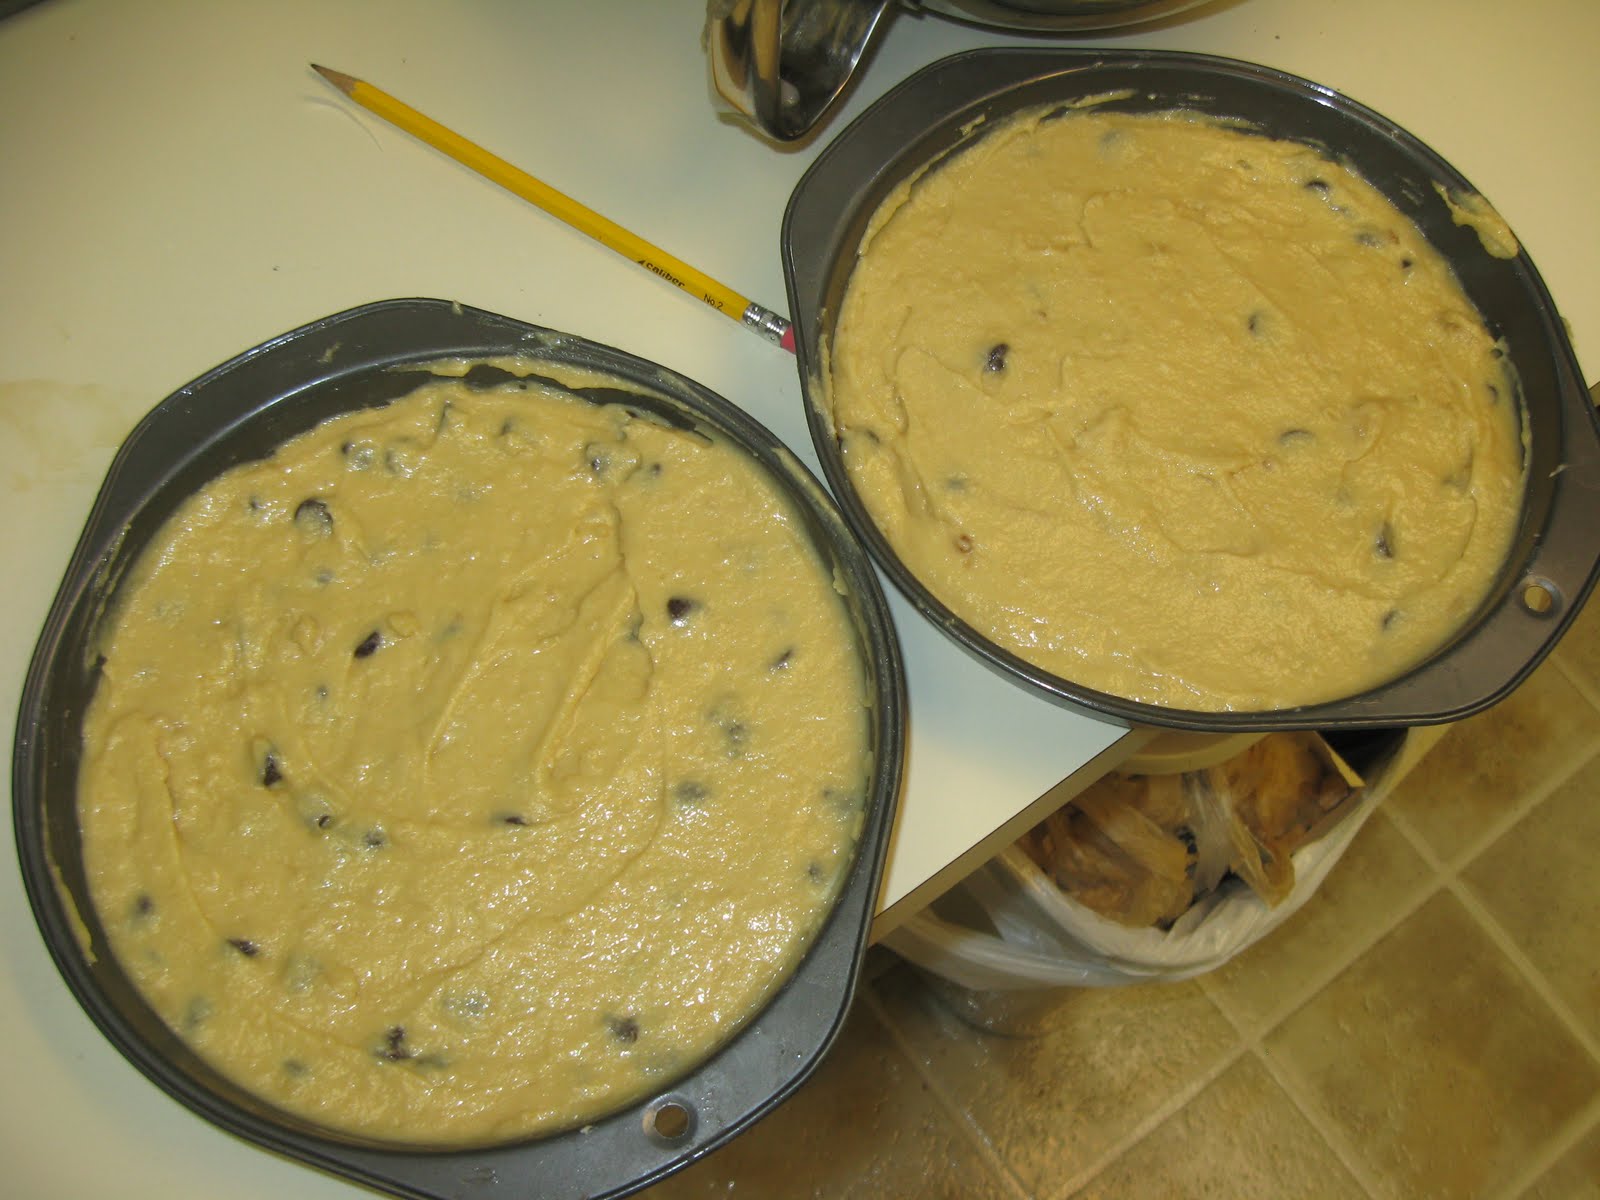
5. Stir in the chocolate chips with a spatula. Divide the dough into the prepared cake pans, level off the tops of the cake batter.

6. Bake the cake layers for 30 to 32 minutes, until layers are golden on top, pulling away from the sides, and a tester comes out clean. The cakes will probably dome, mine did.

7. Remove to cooling racks and let cool. Invert to remove from pans once cooled.

Cookie Dough Filling

This makes more than enough. You can use the extra to make decorations, cookie dough truffles, or do like me and just eat it with a spoon

½ cup (1 stick) unsalted butter, room temperature
¾ cup light brown sugar, packed
2 ¼ cups AP flour
14 oz. (1 can) sweetened condensed milk
1 tsp. vanilla extract
½ cup mini chocolate chips

1. In the bowl of a standing mixer, cream together the butter and sugar until fluffy.

2. Beat in the flour, sweetened condensed milk, and vanilla until combined

3. Stir in the chocolate chips. Transfer dough to a bowl, cover in plastic wrap, and put in the fridge for several hours to firm up, or overnight

Brown sugar buttercream

This made just barely enough for me to cover the outside of the cake

1 ½ cups (3 sticks) unsalted butter, room temperature
¾ cup light brown sugar, packed
2 cups powdered sugar
1 T milk
2 ½ tsp vanilla extract
Pinch salt

1. Cream together the butter and the brown sugar until smooth. Add the powdered sugar, and beat until smooth.

2. Add the milk, vanilla, and salt and beat until combined. Add more milk (to loosen) or powdered sugar (to stiffen) to adjust the consistency as you desire.

Assembly

Cake layers
Cookie Dough Filling
Brown Sugar Buttercream
Mini Chocolate Chips

1. Line an 8 inch cake pan with plastic wrap. Press some of the cookie dough filling into the pan, until you have a disk that is 8 inches across, and ½ inch to 1 inch thick. Place in the freezer for 5-10 minutes

2. Level off the tops of the cakes, so that they are flat. Place the first layer cut side up on your serving plate.

3. Remove the cookie dough from the freezer. Remove it from the cake pan, and peel off the plastic wrap. Place the cookie dough disk upside down (flat side up) on the cake layer. If it sinks a little in the middle (mine bowed a bit), you can work the dough in your hands till it becomes putty-like, and push it into the disk to make it level.

4. Put the second cake layer on top, cut side down. Press the sides of the cake, to make sure the cookie dough layer is flush with the cake.

5. Spread about a quarter of the frosting on the cake as the crumb coat, Place in the fridge for 20 minutes.

6. Add the remaining frosting to the cake, spread evenly around the outside of the cake. Stud the cake with mini chocolate chips for decoration. Refrigerate the cake until ready to serve.


Sunday, April 11, 2010

Red Velvet

This week a friend of mine had an overlap of both her birthday, and an election for an organization she belongs to at the law school. To celebrate, she decided she decided she wanted to make some red velvet cupcakes. To keep with the election theme, she wrote “Pick Flick” on top of the cupcakes (a reference to the movie Election, and yes, it says “FLICK” though on some of them the L and the I run together a little...) It’s been a month or so since I made my last batch of cupcakes, so this was a good way for me to get back into form (bet you didn’t know you could lose your cupcake making form, but you never know). Anyway, as a base we used the Magnolia Bakery recipe. I have to say, I’m often not a big fan of red velvet cakes, I think they’re just overblown vanilla cakes, but these had a really nice flavor, excellent crumb, and were very moist. I would strongly recommend them. Instead of the vanilla frosting recipe called for, we instead made a cream cheese frosting, which is appropriate for red velvet as far as I’m concerned. All told, I still don’t think red velvet cupcakes top my list of desirable cakes, but if that’s what you’re after, this recipe is the way to go.

Red Velvet Cupcakes

Makes 24 cupcakes

3 1/2 cups cake flour (not self-rising)
3/4 cup (1 1/2 sticks) unsalted butter, softened
2 cups sugar
3 large eggs, at room temperature
6 tablespoons red food coloring
3 tablespoons unsweetened cocoa
1 1/2 teaspoons vanilla extract
1 1/2 teaspoons salt
1 1/2 cups buttermilk
1 1/2 teaspoons cider vinegar
1 1/2 teaspoons baking soda

1. Preheat oven to 350 and line cupcake tins. Sift cake flour and set aside. In the bowl of a mixer cream together the butter and sugar on medium speed until fluffy, about 5 minutes.

2. Add the eggs one at a time, beating completely after each addition.

3. In a small bowl whisk together the red food coloring, cocoa, and vanilla extract. Beat into the butter mixture and beat well.

4. Stir the salt into the buttermilk. Alternate adding the buttermilk and the flour in three parts, mixing until just combined. In a small bowl whisk together the vinegar and baking soda, and stir into the batter, mix well. Scrape down the sides of the bowl.

5. Fill cupcake liners 2/3 cups full, and bake for 20 minutes, until a tester comes out clean. Set aside to cool

Cream Cheese Frosting

12 oz. low fat cream cheese, room temperature
½ stick butter, room temperature
2 tsp vanilla extract
3-4 cups powdered sugar

1. Cream together the cream cheese and the butter

2. Add the vanilla and the powdered sugar, beat until combined.

3. Frost cupcakes

Beth piping "Pick Flick" onto the tops of the cupcakes

Monday, March 29, 2010

Pistachio Waffles


It’s been a long time since my last post. I can’t claim I haven’t been cooking or baking, but there just hasn’t been anything really inspired lately, and I didn’t want to waste time writing it up. I was at Trader Joes a while ago, and discovered they’d started selling shelled pistachios, and so I bought some (usually buying them shelled is overly expensive). Since then I’ve been looking for a good way to use them, and this weekend I found one. I had some folks over for brunch and I decided to make some pistachio waffles. I used a recipe for hazelnut waffles I got off of culinate, but I swapped the hazelnuts out for pistachios. I thought these waffles were really good, the flavor of the nuts came through subtly. The waffles themselves are not overly sweet, and so are well complimented by sliced bananas, or maple syrup.

Pistachio Waffles

1¾ cups all-purpose flour
1 Tbsp. sugar
2 tsp. baking powder
½ tsp. salt
1¾ cups milk
3 eggs, separated
6 Tbsp. butter, melted
1 tsp. vanilla extract (I used Fiori di Sicilia, if you want the same citrus undertone, add a little orange zest)
¼ tsp. cream of tartar 1 cup chopped pistachios

1. Whisk together the flour, sugar, baking powder, and salt

2. In a separate bowl, Whisk together the milk, egg yolks, melted butter, and vanilla

3. In the bowl of a mixer, combine the egg whites and cream of tartar, and beat until soft peaks form

4. Mix together the flour and milk mixtures until just combined. Stir in the chopped nuts. Add the egg whites, and fold until just mixed, you should still see streaks of egg white.

5. Cook according to your waffle makers directions. These are best made crispy. Serve with bananas, maple syrup, and chopped pistachios


Saturday, February 6, 2010

Peppermint Cupcakes with Chocolate Mousse

I made these along with the eggnog cupcakes (I actually just divided the batter in half, and then made additions to each). I thought they were really good, and based on the rate at which they disappeared, so did the people I left the, for. On a side note, I’m aware that I’m way behind on posting at the moment (these are actually from December sometime), but if I can I’ll catch up soon. Despite the lack of posts, don’t despair, I haven’t stopped baking or cooking!

Peppermint Cupcakes

Downy Yellow Butter Cake (from the cake bible)

3 egg yolks
½ cup milk
1 ¼ tsp vanilla extract
1 ½ cups sifted cake flour
¾ cups sugar
2 tsp baking powder
¼ tsp salt
½ tsp peppermint extract
¼ cup ground peppermint candies
6 T unsalted butter, softened

1. Preheat oven to 350. In a medium bowl whisk together the egg yolks, 2 T of the milk, and the vanilla.

2. Combine the dry ingredients (including the sugar) in the bowl of a mixer, and mix on low speed for 30 seconds to blend.

3. Add the butter, the peppermint extract and remaining milk, continue mixing on low until ingredients are moistened. Fold in the ground peppermint candies. Then turn the mixer up to medium and beat for another 90 seconds.

4. Slowly add the egg mixture in thirds, beating for 20 seconds after each addition. Scrape down the sides of the bowl.

5. Fill mini-cupcake liners 2/3 full, and bake for 12-15 minutes, or until cakes are golden, and a tester comes out clean. Let cool

Chocolate mousse (from Cookwise)

2 cups heavy cream
1 1/3 cups semisweet chocolate, chopped
1 cup sugar

1. In a heavy saucepan heat the cream until you see steam.

2. Remove from heat, slowly stir in sugar. Add the chocolate, and continue stirring until it is all dissolved.

3. Refrigerate 4 hours, or overnight.

4. With a mixer on medium high speed, beat the mousse until stiff peaks form. Refrigerate until ready to use.

White chocolate peppermint frosting

½ cup heavy cream
1 T unsalted butter
8 oz. white chocolate
Peppermint extract to taste (1/4 – ½ tsp)

1. Bring the cream and butter to a simmer. Remove from heat and stir in white chocolate and peppermint extract

2. Refrigerate until spreadable.

Assembly

Use a piping bag fitted with a small tip to fill the cupcakes with chocolate mousse. Fill just until cupcake begins to bulge.

Frost with the cooled frosting.

Thursday, January 21, 2010

An Indian (British) Dinner

On occasion I do actually post things that aren’t baked (or desserts). This week for dinner I decided to take a crack at making myself some Indian food. But, I made Chicken Tikka Masala, which an Indian friend told me really is British food. Nonetheless, I really enjoyed making it, and eating it. Alongside I made some curried cauliflower, and I had palak paneer and naan from Trader Joes. All in all a full quasi-Indian feast.

For the chicken I used a marinade from Mike’s Table. I thought it was excellent, even by itself it made for a very moist, flavorful chicken thigh. After that I made a sauce based on that from All Recipes, I made a fair number of changes to it though. Finally, I made this curried cauliflower from epicurious, which I thought was only so-so. The flavors weren’t as strong as I was expecting, and some of it burnt, if I were to do it again I might cook it at a slightly lower temperature.

Chicken Tikka Masala

Makes 4 servings

For Marinade:

1 ½ - 2 lbs chicken thighs, skinned, deboned, with excess fat removed
2 T ginger paste
2 T garlic paste
½ tsp salt
¼ cup plain yogurt
½ T chili powder (more if you want it spicier)
1 ½ T vegetable oil

For Sauce:

1 clove garlic, minced
1 jalapeno chili, seeded, deveined, and finely chopped
3-4 green cardamom pods
1 t whole coriander seeds
1 T butter
2 ½ tsp ground cumin
2 tsp hot paprika
1 tsp chili powder
1 14.5 oz. can diced tomatoes, drained
½ cup plain yogurt
Salt to taste

1. Place the chicken, ginger, garlic, and salt in a bowl. Rub the chicken with the mix, trying to get even coverage.

2. In a separate bowl whisk together the yogurt, chili powder, and 1 T of the oil.

3. Toss the chicken with the yogurt mixture. Mix in the rest of the oil.

4. Seal the chicken and marinade in an airtight container, refrigerate for at least an hour, or over night.

5. Spread the chicken with the marinade in a roasting pan, and place under a broiler at 450. Broil for about 20 minutes, or until cooked through but moist.

6. Meanwhile, make the sauce. Melt the butter in a medium saucepan over medium heat. Add the garlic, jalapeno, cardamom pods, and coriander seeds. Saute for a minute.

7. Add the cumin, paprika, some salt, the tomatoes, and the yogurt.

8. Use an immersion (stick) blender to puree the sauce, if you don’t have one you can pour the sauce into a regular blender, just be careful, because it’s hot. You might remove the cardamom pods before this, but I didn’t, and they stayed pretty much intact.

9. Cook the sauce until heated through. Chop the chicken into bite sized pieces. Add the chopped chicken to the sauce and cook for five minutes.

10. Serve immediately over basmati rice

Curried Cauliflower

12 cups cauliflower florets (from about 4 pounds cauliflower)
1 large onion, peeled, quartered
1 teaspoon coriander seeds
1 teaspoon cumin seeds
1/2 cup olive oil
1/2 cup red wine vinegar
3 1/2 teaspoons curry powder
1 tablespoon Hungarian hot paprika
1 3/4 teaspoons salt
1/4 cup chopped fresh cilantro

1. Preheat oven to 450°F. Place cauliflower florets in large roasting pan. Pull apart onion quarters into separate layers; add to cauliflower.

2. Stir coriander seeds and cumin seeds in small skillet over medium heat until slightly darkened, about 5 minutes. Crush coarsely in mortar with pestle. Place seeds in medium bowl. Whisk in oil, vinegar, curry powder, paprika, and salt.

3. Pour dressing over vegetables; toss to coat. Spread vegetables in single layer. Sprinkle with pepper.

4. Roast vegetables until tender, stirring occasionally, about 35 minutes.